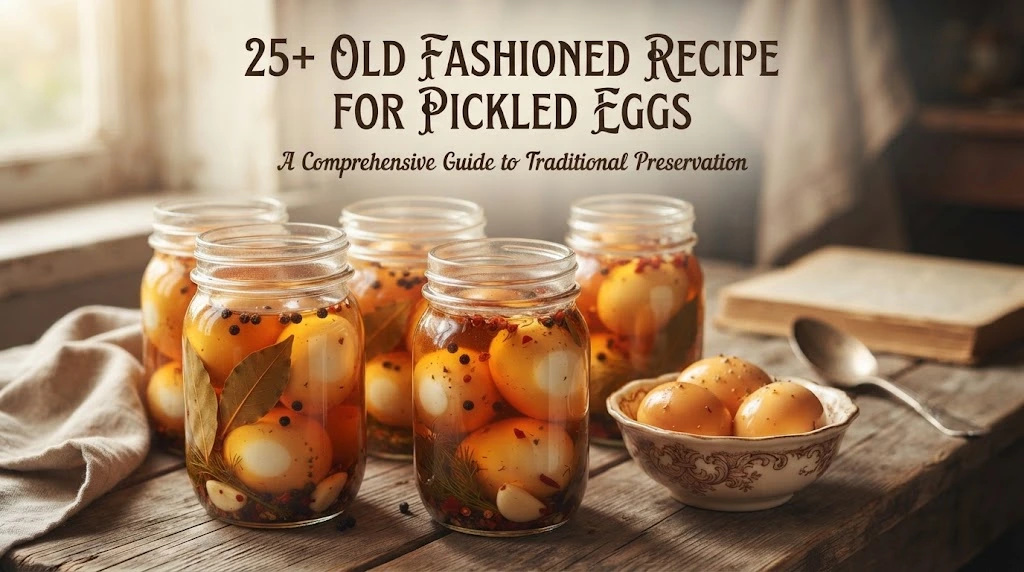
There is something wonderfully nostalgic about a jar of pickled eggs sitting in the refrigerator. The sharp smell of vinegar, the little flecks of spice floating in the brine, and that first bite of a firm egg with a tangy, salty finish can take you straight back to an old country kitchen, a neighborhood tavern, or a family picnic.
The good news is that you do not need complicated equipment or unusual ingredients to make them at home. A handful of eggs, vinegar, spices, and a little patience are enough. The important part is using a reliable refrigerator-pickling method, because pickled eggs are not a food that should be canned and stored at room temperature.
This guide walks through a traditional-style recipe, explains why each ingredient matters, and shows you how to adjust the flavor without compromising the basic method. You will also learn how long the eggs need to sit, how to avoid rubbery whites, what causes cloudy brine, and the safest way to store your finished jar.
Why traditional pickled eggs are still worth making
Pickled eggs are one of those foods that look humble but deliver a surprisingly big flavor. The vinegar cuts through the richness of the yolk, while salt and spices give the egg a savory bite that plain hard-boiled eggs simply do not have.
They are also practical. If you have several eggs to use, pickling gives you an easy make-ahead snack that can be added to salads, sandwiches, snack boards, or a simple lunch plate.
The classic approach is especially appealing because it does not try to hide the egg. You still get the creamy yolk and firm white, but the brine adds a bright, sour character.
A traditional refrigerator-pickled egg usually has four basic elements:
- Hard-cooked eggs for the main ingredient
- Vinegar for the sharp, acidic flavor
- Salt to season the eggs and brine
- Spices such as dill, mustard seed, pepper, onion, or garlic
Sugar can be added when you want a softer sweet-and-sour flavor, while beet juice can give the eggs their familiar pink or purple color.
The National Center for Home Food Preservation recommends refrigerator storage for homemade pickled eggs and specifically notes that there are no home-canning directions for shelf-stable pickled eggs.
The ingredients you need for a classic vinegar brine
For about 12 medium eggs, gather:
- 12 eggs
- 1½ cups white vinegar
- 1 cup water
- 3 teaspoons salt
- ¾ teaspoon dried dill weed
- ¼ teaspoon white pepper
- ¼ teaspoon mustard seed
- ½ teaspoon minced onion or onion juice
- ½ teaspoon minced garlic, or 1 peeled garlic clove
Choose vinegar labeled 5% acidity. White distilled vinegar works particularly well because it has a clean, sharp flavor and keeps the brine light in color.
These proportions are based on the traditional refrigerated pickled-egg formula published by the National Center for Home Food Preservation, with the recipe scaled to 12 eggs. Their tested-style recipes heat the pickling solution before pouring it over the cooked eggs.
For the eggs themselves, clean, sound shells are best. Small or medium eggs can be especially convenient because the brine has less distance to travel into the egg.
Do not feel tempted to reduce the vinegar simply because you prefer a milder flavor. In home pickling, changing the proportions can affect more than taste. Reliable preservation guidance stresses the importance of maintaining the intended acidity rather than improvising with vinegar and water ratios.
How to make pickled eggs step by step
Start by hard-cooking the eggs. Place the eggs in a saucepan in a single layer and cover them with water. Bring the water to a boil, then cook them using a reliable hard-cooking method until the yolks are completely set.
The National Center for Home Food Preservation gives a simmering method of about 15 minutes, followed by cooling the eggs in cold water.
Once the eggs are cool enough to handle, peel them carefully. Try to remove every piece of shell without gouging large pieces out of the white.
Next, prepare the brine. Combine the vinegar, water, salt, dill, white pepper, mustard seed, onion, and garlic in a saucepan. Bring the mixture to a boil, then reduce the heat and simmer it for 5 minutes.
While the brine is hot, loosely pack the peeled eggs into a clean glass jar or other food-safe container with a tight-fitting lid. Do not crush the eggs together. You want enough space for the liquid to surround them.
Pour the hot brine over the eggs until they are completely covered. Seal the container and refrigerate it promptly.
The eggs need time to absorb the flavor. For small eggs, about 1 to 2 weeks gives them time to season. Medium and large eggs can take 2 to 4 weeks for a deeper flavor.
That waiting period is hard, especially when the kitchen smells so good. But patience makes a noticeable difference.
Which vinegar makes the best old-fashioned flavor
White distilled vinegar is usually the best starting point when you want that unmistakable classic pickled-egg taste. It is bright, clean, and strong enough to stand up to the richness of the egg.
Apple cider vinegar gives the finished eggs a rounder, slightly fruity flavor. It also makes the brine darker and warmer in color.
A simple comparison looks like this:
- White vinegar: sharp, clean, traditional
- Apple cider vinegar: mellow, fruity, slightly deeper
- A blend of the two: balanced and less aggressive
- Malt vinegar: bold and distinctive, but changes the traditional profile
For a homemade refrigerator recipe, use vinegar with a clearly stated acidity, preferably 5% acidity, and do not replace part of the vinegar with extra water just to make the brine less sour.
The National Center for Home Food Preservation recommends 5% acidity vinegar for tested pickling applications and warns against changing vinegar, water, and food proportions in preservation recipes.
If you want less bite, the better approach is to choose a recipe specifically designed for that flavor profile rather than casually weakening the brine.
How to get easy-to-peel hard-boiled eggs

Peeling is often the most frustrating part of homemade pickled eggs. You can have a perfect brine and still end up with eggs that look rough because half the white sticks to the shell.
Egg age can make a difference. The National Center for Home Food Preservation notes that very fresh eggs can be harder to peel, while eggs that are at least a few days old may peel more easily after cooking.
After cooking, cool the eggs promptly. Once they are cool, gently crack the shell all over instead of attacking one small spot.
Start peeling from the large end, where there is often an air pocket that gives you a useful starting point.
A few practical tricks help:
- Crack the shell over the entire egg.
- Roll the egg gently between your hands.
- Peel under cool running water if needed.
- Use your fingertips rather than a sharp knife.
- Avoid digging into the white when a stubborn shell fragment sticks.
If one egg comes out badly damaged, it can still be eaten or chopped into egg salad. For the prettiest jar, use the smoothest eggs for pickling.
How to build a flavorful pickle brine
The brine is where you can give your eggs a personality.
Dill creates a familiar pickle-shop flavor. Mustard seed adds tiny bursts of warm spice. Garlic gives the brine savory depth, while onion brings sweetness and background flavor.
Black peppercorns can replace white pepper if you prefer a more rustic appearance. A small amount of red pepper flakes adds heat without overwhelming the vinegar.
For a balanced brine, think in layers rather than dumping in every spice you have.
A good starting combination is:
- Vinegar for acidity
- Salt for seasoning
- Dill for freshness
- Mustard seed for warmth
- Garlic for savory depth
- Onion for sweetness
- Pepper for gentle heat
The best expert tip here is restraint. Strong spices become more noticeable as the eggs sit in the refrigerator. A brine that seems mildly seasoned on day one can taste much stronger after two or three weeks.
Also, simmer the spices as directed rather than boiling them endlessly. Excessive cooking can create a harsh or bitter flavor, and reliable pickling guidance warns that too much spice or cooking spices too long can contribute to bitterness.
How to make sweet-and-sour pickled eggs
Not everyone loves a strongly sour egg. If you grew up eating sweet pickles, a sweeter brine may taste more familiar.
One classic style combines cider vinegar with a sweet ingredient and pickling spices. The National Center for Home Food Preservation includes a traditional sweet-and-sour pickled egg variation using cider vinegar, pasteurized apple cider, cinnamon candy, pickling spice, salt, and garlic salt.
For a simpler homemade version, you can create a sweet-and-tangy flavor by using cider vinegar and a modest amount of sugar in a tested refrigerator-pickling formula.
The goal is not to turn the eggs into candy. You want the sugar to soften the vinegar’s sharp edge.
This style works particularly well when served with:
- Sharp cheddar
- Smoked meat
- Crackers
- Pretzels
- Pickled vegetables
- Potato salad
- A cold sandwich
The sweet-and-sour version is also a good choice for people trying pickled eggs for the first time because it has a gentler flavor than an intensely sour dill brine.
How to make classic red beet pickled eggs
Red beet eggs are perhaps the most visually striking version. The outside of each egg turns pink, then gradually becomes a deeper purple-red as it sits in the brine.
The color comes from beet juice rather than artificial food coloring.
A traditional refrigerated recipe from the National Center for Home Food Preservation uses red beet juice, cider vinegar, brown sugar, and small canned beets.
For a simple serving jar, use beet juice from canned beets and add a few beet slices if you want a stronger color and a rustic appearance.
The longer the eggs sit, the farther the color travels into the white. Cut one open after the eggs have seasoned and you may see a colorful ring surrounding the pale yolk.
Beet eggs are especially good for holiday gatherings, picnics, and snack boards because they look far more elaborate than they actually are.
One practical note: beet brine stains. Use a glass container that you do not mind turning pink and wipe up spills promptly.
How to make spicy pickled eggs with a little heat
A spicy version can be as mild or fiery as you like, but the safest way to change the flavor is to keep the basic tested brine proportions intact and add flavoring rather than randomly changing the vinegar-to-water balance.
For gentle heat, add a small amount of red pepper flakes or a few slices of fresh chili pepper to the brine.
For a deeper smoky character, traditional pickled-egg recipes sometimes use liquid smoke or hickory smoke salt. The National Center for Home Food Preservation includes a dark and spicy refrigerator version that uses cider vinegar, brown sugar, granulated sugar, pickling spice, liquid smoke or hickory smoke salt, and salt.
A useful flavor ladder is:
Mild: black pepper and mustard seed.
Medium: red pepper flakes with garlic.
Hot: fresh chili peppers plus pepper flakes.
Smoky-hot: chili and a small amount of smoke flavor.
Remember that heat can become more noticeable as the eggs sit. Start conservatively. You can always make the next batch hotter.
How long do pickled eggs need to sit

Freshly made pickled eggs are edible once properly prepared and refrigerated, but they will not have the full flavor you expect immediately.
Think of the first few days as the beginning of the process. The vinegar and spices need time to season the egg.
For small eggs, the National Center for Home Food Preservation recommends roughly 1 to 2 weeks for seasoning. Medium and large eggs may need 2 to 4 weeks.
This is one reason old-fashioned pickled eggs are a good make-ahead food. You can prepare them well before a gathering instead of trying to create the finished flavor on the same day.
Mark the jar with the preparation date. That tiny habit makes it much easier to remember how long the eggs have been refrigerated.
For best quality, the National Center for Home Food Preservation recommends using refrigerated pickled eggs within about 3 to 4 months, depending on the recipe and size of the eggs.
How to store homemade pickled eggs safely
This is the part you should take most seriously.
Homemade pickled eggs are a refrigerator food. They are not a shelf-stable canned food.
Do not put a sealed jar of homemade pickled eggs in the pantry, basement, garage, or cupboard and assume the vinegar makes it safe. The National Center for Home Food Preservation states that there are no home-canning directions for pickled eggs and warns that room-temperature storage has been associated with botulism.
Penn State Extension likewise states that there are no approved home-canning recipes for pickled eggs intended for room-temperature storage.
For safe refrigerator storage:
- Keep the eggs refrigerated at 40°F or below.
- Keep the eggs completely covered by the brine.
- Use a clean, food-safe container with a tight lid.
- Wash your hands, utensils, and preparation surfaces thoroughly.
- Do not deliberately alter the vinegar and water proportions.
- Do not treat the jar like a shelf-stable canned product.
- Limit time outside refrigeration to serving time.
The National Center for Home Food Preservation advises keeping pickled eggs refrigerated and limiting their time in the 40°F-to-140°F temperature range to no more than two hours.
When in doubt about a questionable batch, throw it away rather than taste-testing it.
How to serve pickled eggs for the best flavor
You do not need a complicated recipe to enjoy them. A properly seasoned pickled egg can become the star of a simple snack plate.
For an easy lunch, slice two eggs in half and serve them with crackers, cheese, sliced vegetables, and a little mustard.
You can also chop them into potato salad. The vinegar adds acidity that can brighten a rich mayonnaise-based dressing.
Other serving ideas include:
- Sliced over a green salad
- Chopped into an egg salad sandwich
- Served beside grilled or roasted meats
- Added to a snack board
- Served with pretzels and sharp cheese
- Chopped over potato salad
- Added to a breakfast plate
- Served alongside pickled vegetables
For a party, slice the eggs into halves or quarters just before serving. The colored beet version looks particularly attractive when arranged with white cheese, crackers, and fresh herbs.
My favorite styling trick is to keep the presentation simple. A rustic glass jar, a small bowl, fresh dill, and a few slices of beet or chili make the food look intentional without turning a humble recipe into a complicated centerpiece.
Common mistakes that ruin homemade pickled eggs
Most disappointing batches come from a handful of avoidable mistakes.
Using too little vinegar: The brine may taste weak and does not follow the proportions of a tested recipe. Pickling is not the place to guess.
Storing the eggs at room temperature: This is the most serious mistake. Pickled eggs should remain refrigerated.
Using eggs that are badly cracked or damaged: A smooth, intact egg gives you a better final product.
Overcooking the eggs: A gray-green ring around the yolk or a rubbery white can make the finished eggs less appealing.
Peeling aggressively: Large gouges give the brine more exposed surface area and leave you with unattractive eggs.
Under-seasoning the brine: Spices should be balanced, not barely detectable.
Adding too many spices: Strong spices can become overwhelming during the weeks of refrigeration.
Failing to cover the eggs: Eggs should remain submerged in the pickling liquid during storage. The NCHFP recipe directions specifically call for enough solution to completely cover the eggs.
Judging the flavor too soon: Day-one eggs are not the same as properly seasoned eggs. Give the brine time to work.
The biggest lesson is simple: do not improvise with food-safety proportions. Experiment with flavorings, but use a reliable refrigerator-pickling formula as your foundation.
How to customize the recipe without losing its classic character

Once you have made one successful batch, experimenting becomes fun.
For a colorful jar, choose beet juice and beet slices.
For a smoky version, use a recipe that specifically incorporates smoke flavor.
You can also change the presentation. Whole eggs look traditional, while halved eggs are convenient for serving. If you want the brine to penetrate more quickly, remember that changing the physical preparation of the eggs can also change the recipe’s behavior, so follow a tested method rather than assuming every variation is automatically safe.
The best approach is to change one flavor element at a time. Make a classic dill batch first. On your next batch, try cider vinegar. Then experiment with beet juice or heat.
Keeping notes is surprisingly useful. Write down the vinegar, spices, date, and seasoning time. After a few batches, you will know exactly which combination tastes best to you.
Frequently asked questions about homemade pickled eggs
Can I use apple cider vinegar instead of white vinegar?
Yes, a reliable refrigerator pickling recipe can use cider vinegar, and traditional pickled-egg recipes do include it. It creates a deeper, slightly fruity flavor and a darker brine.
Do not simply swap vinegar and water quantities at random. Use a recipe formulated for the vinegar and acidity you are using.
How long can homemade pickled eggs stay in the refrigerator?
For best quality, the National Center for Home Food Preservation recommends using refrigerated pickled eggs within about 3 to 4 months, with the exact seasoning period depending on egg size and recipe.
Always follow the storage guidance for the specific tested recipe you use.
Can I can pickled eggs and store them in the pantry?
No. There are no tested home-canning directions for shelf-stable pickled eggs. Homemade pickled eggs should be treated as a refrigerated product, not pantry food.
Why are my pickled eggs rubbery?
Rubbery whites usually start with the cooking process rather than the vinegar. Overcooking can make egg whites firm and chewy. Use a reliable hard-cooking method and cool the eggs promptly after cooking.
Why did my pickled eggs turn pink?
If you used beet juice or beets, the color is completely expected. Beet pigments gradually move into the egg white during refrigeration, creating the classic pink or purple color.
Without beets, a pink color can have other causes, and any unusual appearance accompanied by signs of spoilage should be treated cautiously.
How soon can I eat pickled eggs?
They need time to develop their best flavor. Small eggs generally need about 1 to 2 weeks, while medium and large eggs may need 2 to 4 weeks for stronger seasoning.
You can think of the first week as the beginning of the flavor transformation rather than the finished product.
Can I make pickled eggs less sour?
You can choose a recipe with a sweeter or milder flavor profile, such as a traditional sweet-and-sour version. However, do not simply dilute the vinegar in a preservation recipe because acidity is an important part of safe pickling.
Conclusion
A good jar of pickled eggs proves that simple food can still have plenty of character. Start with properly hard-cooked eggs, use a reliable vinegar-based refrigerator brine, give the spices time to develop, and resist the temptation to rush the process.
Most importantly, keep the finished eggs refrigerated at all times and never treat homemade pickled eggs as shelf-stable canned food. That one rule matters far more than whether you prefer dill, garlic, beet, sweet, or spicy flavors.
Once you master the classic version, you can make the recipe your own. Try cider vinegar for a softer tang, beets for color, dill for a familiar pickle flavor, or chili for extra heat. The method stays reassuringly old-fashioned: cook the eggs, prepare the brine, cover the eggs, refrigerate, and let time do the rest.
The reward is a jar of bright, tangy, savory eggs that feels both nostalgic and completely at home in a modern kitchen.