
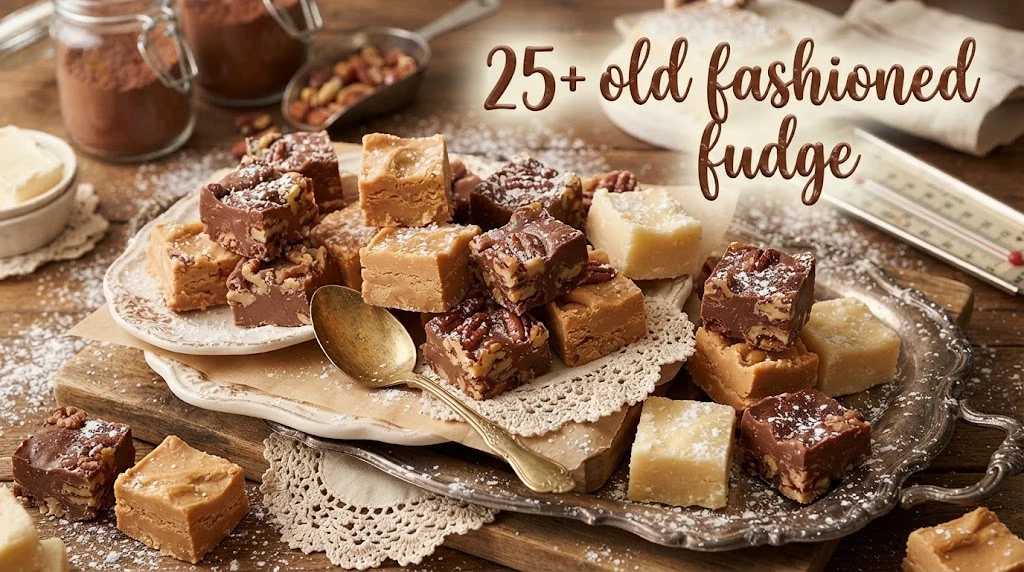
There is something special about a pan of homemade fudge cooling on the kitchen counter. Maybe it is the deep chocolate smell that fills the room, or the way a simple square can bring back memories of holidays, family gatherings, and treats made by someone who never needed a recipe card. Old fashioned fudge has that kind of charm. It does not depend on marshmallow cream, condensed milk, or complicated shortcuts. The traditional method relies on a few familiar ingredients and careful cooking to create a rich, creamy candy with a texture that melts in your mouth.
Making traditional fudge can seem intimidating because the sugar syrup needs to reach the right temperature and then cool before you beat it. But once you understand what each stage is doing, the process becomes much less mysterious. Classic recipes commonly cook the mixture to the soft-ball stage, around 234–240°F, before cooling and beating it until it thickens and loses its shine.
This guide walks through the ingredients, technique, troubleshooting, storage, variations, and serving ideas so you can make a batch that tastes like the kind of chocolate candy people remember for years.
What makes old fashioned fudge different?
Traditional fudge gets its distinctive texture from controlled sugar crystallization. That is the part that separates a classic cooked fudge from many quick recipes that rely on sweetened condensed milk or marshmallow creme.
A traditional chocolate fudge mixture usually contains sugar, cocoa or chocolate, milk, butter, and vanilla. Some recipes also use a small amount of corn syrup or another ingredient to help manage crystallization. Classic recipes vary, but the method remains remarkably consistent: dissolve the sugar, cook the syrup to the proper temperature, cool it, and beat it until the texture changes.
The finished candy should feel dense but tender rather than sticky or hard. When you bite into a well-made square, it should hold its shape but give way easily.
That is why the cooking stage matters so much. You are not simply heating chocolate. You are building the structure that determines how the finished fudge behaves.
Traditional old fashioned fudge ingredients
The ingredient list for classic fudge is surprisingly short. One traditional version uses granulated sugar, cocoa powder, milk, salt, butter, and vanilla, while other established recipes use evaporated milk or a little corn syrup.
For a reliable batch, gather:
- Granulated sugar for sweetness and structure
- Unsweetened cocoa powder for deep chocolate flavor
- Whole milk or evaporated milk for richness
- Butter for a smooth, creamy finish
- Vanilla extract to round out the chocolate
- A small amount of salt to balance the sweetness
- Chopped pecans or walnuts, if desired
Ingredient quality matters, but precision matters even more. Candy making leaves less room for casual measuring than ordinary baking because the amount of water in the mixture affects the final concentration of sugar.
If you use evaporated milk, remember that it contains less water than regular milk. That can make the cooking process more predictable, which is one reason many traditional recipes use it.
How to make old fashioned fudge from scratch
The classic method takes patience, but every stage has a purpose.
Start by preparing an 8-inch square pan. Butter it lightly or line it with parchment so the finished candy can be lifted out easily.
Next, combine the sugar and cocoa thoroughly in a heavy saucepan. Breaking up cocoa lumps now is much easier than trying to smooth them out after the milk has been added.
Add the milk and stir until the mixture is evenly combined. Place the pan over medium heat and cook until the sugar dissolves and the mixture reaches a full boil.
From this point, temperature becomes your best guide. Traditional fudge recipes commonly target about 234–240°F, known as the soft-ball stage.
Once the mixture reaches the target temperature, remove it from the heat. Add the butter and vanilla according to your recipe, then allow the mixture to cool without unnecessary stirring.
The final stage is beating. As you work the mixture, it becomes thicker and changes from glossy to more matte. That visual change is an important sign that crystallization is occurring and the fudge is nearly ready for the pan.
Work quickly once the mixture reaches the right consistency. Traditional fudge can firm up surprisingly fast.
Why the soft-ball stage matters
The phrase soft-ball stage sounds complicated, but the idea is simple. The sugar syrup has reached a concentration where a small amount dropped into cold water can form a soft ball that flattens when removed.
For fudge, the commonly cited range is approximately 234–240°F, although many traditional recipes aim around 234–238°F.
A candy thermometer makes this much easier because you can monitor the actual temperature rather than guessing from appearance.
If you do not have a thermometer, the cold-water test can work. Drop a small amount of the hot mixture into very cold water. It should gather into a soft, flexible ball rather than dissolving immediately or becoming firm and brittle.
There is an important warning here: do not rely on time alone. A recipe that takes seven minutes on one stove may take longer or shorter on another. Pan size, burner strength, humidity, altitude, and the starting temperature of the ingredients can all affect cooking.
Temperature gives you a much more useful target than the clock.
How to get creamy rather than grainy fudge

Grainy fudge usually comes down to unwanted sugar crystals forming at the wrong time or the mixture being handled incorrectly.
During cooking, the goal is to dissolve the sugar completely and then control crystallization during cooling and beating. Some traditional methods deliberately avoid stirring once the mixture reaches a boil, while others use frequent stirring depending on the recipe. The safest approach is to follow the method designed for your specific formula rather than mixing techniques from several recipes.
Cooling also matters. Traditional fudge recipes often allow the cooked mixture to cool substantially before beating. Epicurious’s old-fashioned method, for example, cools the mixture to about 110°F before vigorous beating.
Do not rush this stage simply because the mixture looks ready.
Another useful habit is to avoid scraping sugar crystals from the sides of the saucepan back into the candy. Those crystals can encourage more crystallization and contribute to a rough texture.
If your fudge repeatedly turns gritty, focus first on temperature control and cooling technique rather than adding more butter or milk.
Common mistakes when making traditional fudge
Fudge rewards attention. Small mistakes can change the final texture, but most problems are fixable once you understand what went wrong.
Cooking too little: If the mixture never reaches the proper soft-ball stage, it may remain soft or fail to set properly.
Cooking too much: Taking the syrup well beyond the intended temperature can produce dry, firm, crumbly candy.
Beating too early: Starting the beating stage while the mixture is still too hot can interfere with the desired crystallization.
Beating too late: If the fudge has already become very firm in the saucepan, getting it into the pan evenly can become difficult.
Using the wrong pan: A small saucepan can allow the boiling mixture to rise dangerously high. One traditional recipe specifically recommends using a large saucepan because the mixture can boil up substantially.
Skipping preparation: Always prepare the pan before the fudge reaches the final stage. You will not want to stop and search for parchment while the candy is setting.
The best habit is to have your thermometer, prepared pan, butter, vanilla, spoon, and other tools ready before you turn on the stove.
Can you make old fashioned fudge with cocoa powder?
Yes. Cocoa powder is a classic choice for traditional chocolate fudge and appears in many established recipes.
Cocoa gives the fudge a concentrated chocolate flavor without adding the extra cocoa butter found in solid chocolate. The result can be rich, deep, and pleasantly old-fashioned.
Unsweetened cocoa is the better choice because the recipe already contains a substantial amount of sugar. Adding sweetened cocoa would change the balance and make the final candy much sweeter than intended.
You can also experiment with different unsweetened cocoa powders. A darker cocoa can produce a deeper color and a more intense chocolate impression, although the exact result depends on the cocoa and the rest of the recipe.
For a nostalgic version, a straightforward cocoa-based recipe is often the best place to start. Once you master that version, you can explore more elaborate chocolate variations.
Old fashioned fudge with evaporated milk
Evaporated milk is especially useful when you want a rich traditional texture without using heavy cream.
Several classic-style recipes use evaporated milk alongside sugar, cocoa, and butter. One published old-fashioned version, for example, combines sugar, cocoa, evaporated milk, butter, vanilla, and optional nuts.
Because evaporated milk has had some of its water removed, it is more concentrated than regular milk. That difference affects the candy’s cooking behavior and contributes to its creamy quality.
If a recipe specifically calls for evaporated milk, do not automatically substitute an equal amount of another dairy product. A substitution changes the water and fat balance, which can alter cooking time and texture.
For the most reliable result, use the exact dairy ingredient listed in the recipe you are following.
How to make old fashioned fudge without a candy thermometer
A thermometer is the easiest method, but traditional cooks made fudge successfully without one.
The cold-water test is the classic alternative. Fill a small glass with very cold water and carefully drop a little of the boiling syrup into it.
For fudge, the syrup should form a soft ball that you can pick up and gently flatten. The soft-ball stage generally corresponds to approximately 234–240°F.
This method takes practice because water temperature, spoon size, and the amount of syrup can affect what you see.
If you are new to candy making, I recommend using a thermometer whenever possible. It removes much of the guesswork and makes it easier to understand how your particular stove behaves.
The thermometer is not a substitute for observation, though. Watch the mixture, notice how it boils, and learn how it changes as it approaches the target temperature.
How to know when fudge is ready to beat
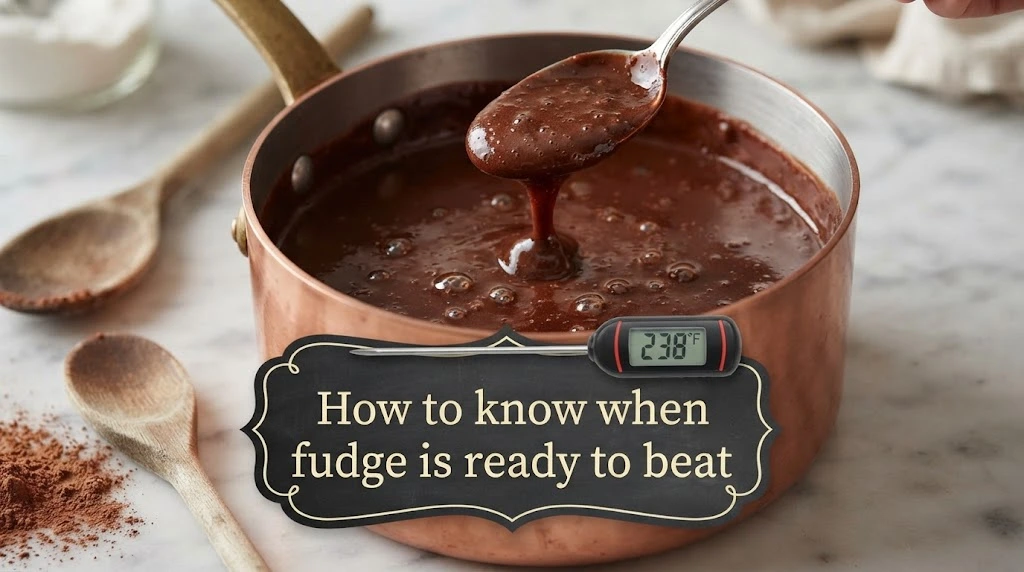
This is one of the most important moments in the entire recipe.
After cooking, the mixture needs to cool before you beat it. Traditional methods vary, but the visual goal is consistent: after enough beating, the candy should become thicker and less glossy.
Epicurious’s traditional recipe recommends cooling the cooked mixture before beating it with a wooden spoon for several minutes. It describes the finished mixture as very thick and no longer glossy.
Think of it as a transformation. At first, the mixture looks like shiny chocolate syrup. Then it becomes thicker. Eventually, it looks more matte and begins to hold its shape.
Stop once the fudge reaches that point and quickly transfer it to your prepared pan.
Do not keep beating simply because you are worried it is not thick enough. Overworking the candy can make it difficult to spread and may produce a dry or crumbly texture.
Old fashioned fudge variations to try
Once you can make the basic chocolate version, variations become much easier.
Chocolate pecan fudge: Stir in toasted chopped pecans near the end for crunch and a warm nutty flavor.
Walnut fudge: Walnuts provide a slightly earthy contrast to the sweet chocolate.
Sea salt fudge: A very small amount of flaky salt on top can make the chocolate taste more intense.
Coffee fudge: A little instant espresso powder can deepen the chocolate flavor without making the candy taste strongly like coffee.
Peanut butter fudge: Swirl a small amount of smooth peanut butter into the finished mixture, but expect the texture to change.
Mint chocolate fudge: Add a modest amount of peppermint extract for a holiday-style variation.
The important rule is restraint. Fudge already has a strong flavor and rich texture. Too many mix-ins can make it difficult to cut and can distract from the chocolate.
If you add nuts, toast them first and allow them to cool. Toasting brings out their natural oils and gives the finished candy more flavor.
How to cut fudge into neat squares
Beautiful fudge does not require professional equipment. It mostly requires patience.
Let the fudge set completely before cutting. Some recipes recommend several hours at room temperature, and an overnight rest can make cutting easier.
Use a sharp knife with a straight edge. For especially clean cuts, warm the knife briefly, wipe it dry, and make one decisive cut rather than sawing back and forth.
Repeat the process as needed, wiping the blade between cuts.
For small gift pieces, cut the pan into 1-inch squares. For dessert plates, slightly larger pieces can feel more generous.
Remember that fudge is rich. Smaller pieces often make a better serving size because guests can enjoy the texture without feeling overwhelmed by sweetness.
If the fudge seems too soft to cut cleanly, give it more time to set rather than immediately changing the recipe.
How to store homemade old fashioned fudge
Once the fudge has fully set, store it in an airtight container with parchment or wax paper between layers.
Traditional fudge can generally remain at room temperature when stored properly. One tested old-fashioned recipe recommends keeping it tightly covered at room temperature for up to a week.
Keep the container away from heat and direct sunlight. A warm kitchen can soften the candy, while excessive moisture can affect its surface.
You can also refrigerate fudge if you prefer a firmer texture, but cold storage is not always necessary. If you refrigerate it, wrap it well so it does not absorb odors from other foods.
For gifting, package individual squares in small paper candy cups or wrap them in wax paper. A simple ribbon and handwritten note can make homemade fudge feel much more personal than a store-bought box.
How to fix fudge that did not set
A batch that refuses to set can be frustrating, especially after all that stirring.
First, give it enough time. Fudge can need several hours to cool and firm completely. Do not judge its final texture while it is still warm.
If the candy remains noticeably soft after setting, the syrup may not have reached the proper temperature during cooking. Traditional fudge depends on reaching the soft-ball stage, so undercooking can leave too much water in the mixture.
If you suspect undercooking, some fudge recipes can be carefully reheated and cooked again to the correct temperature. However, this requires care because the mixture is extremely hot and repeated cooking can change the texture.
For your next batch, use a reliable candy thermometer and check its accuracy if necessary.
The opposite problem is equally common. If your fudge is dry, crumbly, or hard, you may have cooked the syrup too far or allowed excessive crystallization.
The goal is not simply “cook until thick.” The goal is to reach the correct sugar concentration and then control the cooling and beating stages.
How to serve old fashioned fudge
Fudge is usually served in small squares, but you can make it part of a larger dessert spread.
For a holiday table, arrange chocolate fudge beside cookies, salted nuts, dried fruit, and fresh berries. The different textures make the dessert plate more interesting.
For an afternoon coffee break, one or two small squares are plenty. Pair them with unsweetened coffee so the drink balances the sweetness of the candy.
You can also crumble a small amount of fudge over vanilla ice cream. The contrast between cold, creamy ice cream and dense chocolate candy is especially good.
For a gift box, combine several variations:
- Classic chocolate
- Chocolate pecan
- Sea salt chocolate
- Mint chocolate
Label each flavor clearly so guests know what they are trying.
Because fudge is rich, presentation works best when you keep it simple. Clean cuts, neat rows, and small portions look more inviting than a crowded plate covered with too many toppings.
Is old fashioned fudge good for holidays and gifts?
Absolutely. Fudge has several qualities that make it especially useful for holiday baking: it can be prepared ahead, cut into small portions, and packaged easily.
It also feels personal. A homemade batch says that you spent time making something rather than simply picking up a box at the store.
For Christmas, Thanksgiving gatherings, birthdays, teacher gifts, cookie exchanges, or neighbor gifts, a small box of homemade fudge is easy to customize.
Make the fudge at least several hours before you plan to package it. Once it has completely set, cut it into uniform pieces and separate the layers with parchment or wax paper.
If you are transporting it, avoid leaving the container in a hot car. Butter-rich candy can soften significantly when exposed to heat.
A thoughtful presentation can be as simple as a small kraft box, parchment paper, and a handwritten flavor label.
Final thoughts on old fashioned fudge
Old fashioned fudge is worth learning because it teaches you something that shortcut recipes cannot: how temperature, sugar, cooling, and timing work together to create texture. The ingredient list may look humble, but the technique turns those basic ingredients into a candy that feels rich and special.
The most important lesson is not to rush. Prepare your pan and tools before cooking, measure carefully, use a candy thermometer when possible, and pay attention to the soft-ball stage. Traditional fudge commonly reaches about 234–240°F before cooling and beating, with many recipes targeting the lower part of that range.
Once you understand that process, you can confidently add pecans, walnuts, peppermint, espresso, flaky salt, or other flavors without losing the character of the classic recipe.
And if the first batch is not perfect, do not give up. Fudge is one of those recipes where the second attempt can be dramatically better because you now know how your pan, burner, thermometer, and kitchen behave.
Serve the finished squares with coffee, wrap them as a homemade gift, or keep a small container in the kitchen for those moments when you want something deeply chocolatey. The best part of traditional fudge is that it never needs to be complicated to feel special.
FAQs
1. What is old fashioned fudge made of?
Traditional chocolate fudge commonly uses granulated sugar, cocoa powder or chocolate, milk, butter, and vanilla. Some versions also include salt, evaporated milk, corn syrup, or nuts. The exact ingredients vary by family recipe, but the traditional cooking method is what gives the candy its characteristic texture.
2. What temperature should old fashioned fudge reach?
Most traditional fudge recipes cook the sugar mixture to the soft-ball stage, generally around 234–240°F. Many recipes use approximately 234–238°F as the target range. A candy thermometer is the easiest way to monitor this stage.
3. Why did my old fashioned fudge turn out grainy?
Graininess usually means sugar crystallized in an uncontrolled way. Possible causes include incorrect cooking temperature, disturbing the mixture at the wrong time, or rushing the cooling and beating stages. Careful temperature control and following one consistent recipe method can help prevent it.
4. Can I make old fashioned fudge without evaporated milk?
Yes, but use the dairy ingredient specified by your chosen recipe. Whole milk and evaporated milk contain different amounts of water, so swapping them can change cooking behavior and final texture. Several traditional recipes use whole milk, while others specifically use evaporated milk.
5. Why won’t my fudge set?
The most common reason is undercooking. If the sugar syrup does not reach the soft-ball stage, the mixture can retain too much water and remain soft. Give the fudge enough time to cool completely before deciding that it has failed, then use a thermometer on your next batch for better control.
6. How long does homemade fudge last?
When stored tightly covered at room temperature, traditional fudge can generally keep for about a week, although the exact shelf life depends on the recipe and storage conditions. Keep it away from heat, moisture, and strong odors.
7. Should old fashioned fudge be refrigerated?
Refrigeration is usually not required for a traditional fudge that has been properly cooked and stored in an airtight container. Room-temperature storage often preserves its intended texture better. If you prefer firmer fudge or your kitchen is warm, refrigeration can be useful, but wrap it well to protect it from moisture and odors.