

There is a reason a simple glazed donut can feel more satisfying than the most elaborate pastry in the case. You pick it up, the glaze catches the light, and the first bite gives you that soft, slightly chewy center with a thin layer of sweetness on top. No fancy filling is needed. No mountain of toppings is required. When the dough is fresh and the glaze is balanced, a classic old fashioned glazed donut has a quiet kind of magic.
Making these at home is also more approachable than it first appears. The dough does require yeast, rising time, gentle handling, and hot oil, but none of those steps are difficult once you understand what you are looking for. A traditional yeast-raised donut should become light and airy after proofing, while frying creates the golden exterior that holds the glaze beautifully. Reliable baking sources use warm milk, yeast, eggs, butter, flour, sugar, and vanilla in similar homemade glazed-doughnut formulas.
The glaze itself can stay wonderfully simple. Powdered sugar, milk or cream, and vanilla are enough for a smooth coating that sets on the surface without hiding the flavor of the dough.
This guide explains how to make the donuts from scratch, how to get the texture right, why some batches become heavy, how to fry them safely, and how to create that bakery-style glaze at home.
What makes an old fashioned glazed donut special?
The phrase “old fashioned” can mean different things depending on the recipe. Some bakers use it to describe a cake-style donut with a cracked, rustic surface, while others use it more loosely for a traditional homemade glazed donut.
That distinction matters. A cake donut uses baking powder or baking soda for lift and has a more tender, compact crumb. A yeast-raised donut depends on yeast and fermentation, which gives it a lighter, more airy texture.
For the classic homemade glazed version, the yeast-raised approach gives you the soft bakery-style interior most people expect. King Arthur Baking’s yeast-raised recipe, for example, uses yeast, milk, egg, butter, flour, sugar, vanilla, and a little nutmeg before frying the doughnuts.
The glaze should add sweetness without turning the donut into a sugar bomb. A good coating is thin enough to let the dough shine but thick enough to leave a noticeable, glossy layer.
The real goal is contrast: a lightly crisp outside, soft interior, and smooth sweet glaze.
Ingredients you need for homemade glazed donuts
You do not need a long shopping list. In fact, keeping the ingredients simple makes it easier to notice how much each one contributes.
For the dough, gather:
- All-purpose flour
- Whole milk
- Instant or active dry yeast
- Granulated sugar
- Eggs
- Unsalted butter
- Vanilla extract
- Salt
- A small amount of nutmeg, if desired
- Vegetable oil or another suitable frying oil
A tested homemade glazed-doughnut recipe from Sally’s Baking Addiction uses warm whole milk, yeast, sugar, eggs, melted butter, vanilla, nutmeg, salt, and all-purpose flour. It produces a yeast-raised donut designed for frying.
For the glaze, you only need:
- Powdered sugar
- Milk or cream
- Vanilla extract
The important ingredient is not something you buy. It is patience. Yeast dough needs time to develop and rise, and rushing that stage can leave you with dense donuts.
For best results, measure flour carefully. Too much flour makes the dough stiff, which can prevent the finished donuts from becoming light and tender.
How to make an old fashioned glazed donut from scratch
Start by warming the milk. It should feel warm rather than hot. Excessively hot liquid can damage yeast, while very cool milk simply slows activation.
Combine the warm milk with yeast and some of the sugar. If you use active dry yeast, give it a few minutes to activate according to your yeast’s instructions. Instant yeast can usually go directly into the dough.
Add the eggs, melted and slightly cooled butter, vanilla, and remaining sugar. Mix until the ingredients are combined.
Gradually add the flour and salt. You want a soft dough that feels slightly tacky but not wet enough to be impossible to handle.
Knead the dough until it becomes smoother and elastic. Sally’s current recipe recommends roughly five to seven minutes of kneading.
Place the dough in a lightly greased bowl, cover it, and let it rise somewhere comfortably warm. A properly risen dough should become noticeably larger and feel lighter.
Once it has risen, gently release excess air. Roll the dough to an even thickness, cut your donut shapes, and place them on parchment.
Let the shaped donuts rest again before frying. This second rise is important because it helps create the airy interior associated with a good yeast-raised donut.
How long should homemade donuts rise?
Rise time depends on your kitchen temperature, yeast, dough, and humidity, so the clock should not be your only guide.
A typical yeast-raised recipe may take around 90 minutes for the first rise and another 30 minutes to an hour after shaping. King Arthur Baking gives a first rise of about 1½ to 2 hours for its yeast-raised doughnuts, followed by a shorter shaped rise.
Sally’s recipe similarly uses a warm environment for the dough’s first rise and then gives the shaped donuts additional resting time before frying.
Look for physical signs instead.
The dough should:
- Become visibly larger
- Feel lighter when handled
- Spring back gradually when gently pressed
- Hold its shape without feeling heavy
If your kitchen is cold, the dough may take longer. Do not force it by putting the bowl directly beside a very hot stove or in an excessively warm location.
A slow, controlled rise is better than overheating the dough.
How to shape the donuts properly
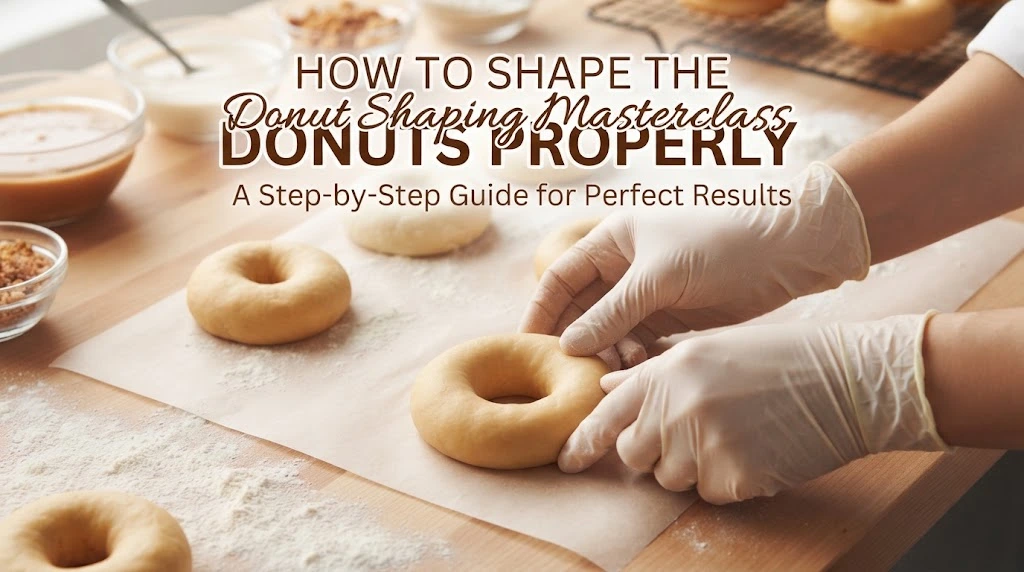
Shaping sounds simple, but it can make a surprising difference in the final texture.
Roll the dough evenly. If one section is thick and another is thin, the donuts will fry at different rates. Aim for a consistent thickness rather than trying to make them extremely thin.
Use a donut cutter or two round cutters to create the ring. Dip the cutter lightly in flour if the dough sticks.
Place each shaped donut on parchment with enough space between them. Avoid pressing them down after cutting because you want to preserve the air you developed during the rising process.
Save the donut holes. They are not scraps; they make excellent little test pieces for checking your frying temperature.
Try not to repeatedly reroll the leftover dough. Every extra round of rolling and cutting develops more gluten and can make later donuts tougher.
A useful approach is to cut the main donuts first, then gently gather the scraps once and cut another batch.
What oil is best for frying donuts?
Choose an oil with a relatively neutral flavor and a suitable frying temperature. Vegetable oil is a practical option because it does not compete with the flavor of the donut or glaze.
You can also use other frying fats depending on your recipe and preference. King Arthur Baking’s old-fashioned cake-doughnut recipe, for example, lists lard, shortening, or vegetable oil as options.
Use a heavy-bottomed pot with enough capacity to give the oil plenty of room. Hot oil can bubble dramatically when food enters the pot, so avoid filling the pan too high.
A thermometer is one of the most useful tools you can own for this recipe. King Arthur recommends monitoring frying fat with a thermometer, while its old-fashioned cake-doughnut recipe targets approximately 365–375°F.
For a yeast-raised donut, many recipes work around the mid- to high-300s. Sally’s recipe, for example, heats vegetable oil to 375°F.
The exact target can vary by recipe, so follow the temperature recommended for your dough.
How to fry an old fashioned glazed donut
Frying is where all your preparation comes together.
Heat the oil to the temperature specified by your recipe. Once the oil is ready, carefully lower only a few donuts into the pot at a time.
Do not crowd the pan. Adding too many donuts at once can cause the oil temperature to drop, which may leave the pastries greasy instead of crisp.
Fry the first side until golden, then carefully turn the donut and cook the other side. A typical yeast-raised donut may need around one minute per side, depending on its size and the oil temperature.
Watch the color rather than blindly following the clock. You want a warm golden brown, not a dark, bitter crust.
Remove each donut with a slotted spoon or spider and place it on a wire rack lined underneath with a baking sheet. This allows excess oil to drain while keeping the underside from sitting in grease.
Let the donuts cool enough to handle before glazing.
Why temperature matters so much
Temperature is one of the biggest factors separating a light donut from a greasy or undercooked one.
If the oil is too cool, the dough absorbs more oil before the exterior sets. The result can feel heavy and greasy.
If the oil is too hot, the outside may brown quickly while the center remains undercooked.
That is why a thermometer is worth using. King Arthur specifically advises monitoring the oil temperature and making heat adjustments gradually because frying fat responds differently from water and can retain heat.
There is another temperature issue: the dough itself.
If your shaped donuts have become very warm and soft before frying, handle them carefully. A delicate dough can collapse if you squeeze it or drop it roughly into the oil.
Use a gentle hand and work in small batches.
If the temperature drops after adding donuts, wait for the oil to recover before starting the next batch.
How to make the perfect donut glaze
The beauty of a classic glaze is its simplicity.
Whisk powdered sugar with a small amount of milk or cream and vanilla. Start with less liquid than you think you need because you can always thin the glaze, but rescuing an overly thin glaze takes more powdered sugar.
Sally’s basic glazed-doughnut method uses confectioners’ sugar, milk or cream, and vanilla. The glaze is whisked until smooth, and the coated donuts are allowed to sit while the glaze sets.
You want a consistency that coats the donut rather than immediately sliding off.
If the glaze looks:
- Too thick: Add milk a few drops at a time.
- Too thin: Add more powdered sugar.
- Too sweet: Add a tiny pinch of salt.
- Too plain: Add vanilla, citrus zest, or a very small amount of maple flavor.
Do not add a large amount of liquid at once. That is the easiest way to turn a thick glaze into a watery icing.
For a classic appearance, keep the glaze white and smooth.
When should you glaze the donuts?

Let the donuts cool enough that they are no longer piping hot, but do not wait until they are completely cold if your recipe is designed for warm glazing.
The ideal timing depends on the glaze and the texture you want. A warm donut can help the glaze spread into a smooth coating, but an excessively hot donut can cause the glaze to become thin and disappear.
Dip the top of each donut into the glaze. Lift it straight up and allow excess icing to drip back into the bowl.
Place the donut on a wire rack and let the coating set.
Sally’s recipe notes that its glaze sets in roughly 20 minutes.
For a thicker coating, allow the first layer to set and add another light dip.
I prefer a single, even layer for a classic glazed donut. It keeps the pastry balanced and lets the dough remain the star.
Why are my glazed donuts dense?
Dense donuts usually point to a problem with the yeast, rising, flour, or handling.
The first thing to check is the yeast. If it is old or has been stored poorly, it may not produce enough lift.
Next, look at the first rise. If the dough barely increases in size, do not expect the shaped donuts to become magically airy in the fryer.
Too much flour is another common issue. Adding extra flour because the dough feels sticky can quickly turn a soft dough into a stiff one.
Remember that slightly tacky dough is not necessarily bad dough.
Over-kneading or aggressively rolling the dough can also affect texture. You want enough gluten development to give the donut structure, but you do not want to make the dough unnecessarily tough.
Finally, check your second rise. A properly proofed donut should feel noticeably lighter than a freshly cut piece of dough.
If your donuts are consistently dense, change one variable at a time. That makes it much easier to identify the real problem.
How to get a light, fluffy donut inside
A light interior begins long before the oil gets hot.
Use fresh yeast and warm—not hot—milk. Give the dough enough time to rise, and avoid adding excessive flour during kneading or shaping.
Sally’s recipe uses whole milk, eggs, butter, and yeast to create a tender dough and recommends a first rise followed by a second rest after cutting.
Gentle handling matters too. Once the shaped donuts have risen, move them carefully.
A useful trick is to cut parchment into small squares and let the donuts rise on those pieces. When it is time to fry, you can gently slide each donut toward the oil rather than grabbing the delicate dough with your fingers.
Do not press down on the donuts immediately before frying.
You want to preserve as much of the trapped gas as possible. Those little pockets expand during frying and create the airy structure you are after.
Common mistakes to avoid
Homemade donuts become much easier when you know which shortcuts usually cause trouble.
Adding too much flour: This is one of the fastest ways to make the dough heavy.
Skipping the second rise: The donuts may fry, but they can lack the light texture you want.
Using cold ingredients: Cold milk can slow yeast activity and extend the rising time.
Overheating the milk: Very hot liquid can damage yeast.
Crowding the fryer: Too many donuts at once can sharply reduce oil temperature.
Guessing the oil temperature: A thermometer provides much better control than judging by appearance alone.
Glazing very hot donuts: Excessive heat can make the glaze run off instead of forming a clean coating.
Making the glaze too thin: It may soak into the donut rather than sitting on top.
Cutting the donuts too thin: Thin dough can produce flatter, less satisfying donuts.
Ignoring oil safety: Never leave hot oil unattended, and keep water away from the frying pot.
Good donut making is mostly about controlling a few variables rather than performing complicated tricks.
Baked vs. fried glazed donuts
You can bake donuts, but you should know that the result will be different.
A baked donut is convenient and usually lighter in terms of the frying process, but it does not have the same fried crust and flavor as a donut cooked in hot oil.
King Arthur describes baked cake donuts as a newer alternative to traditional cake donuts, noting that old-fashioned versions were deep-fried.
For yeast-raised donuts, King Arthur also notes that baking is possible but produces a different result from frying, with less of the characteristic crisp crust and deep-fried flavor.
Choose baked donuts when:
- You want a simpler method.
- You already own a donut pan.
- You prefer not to work with hot oil.
- You want to experiment with cake-style donuts.
Choose fried donuts when:
- You want classic bakery texture.
- You enjoy a crisp exterior.
- You want the richer flavor produced by frying.
- You are specifically chasing a traditional glazed-donut experience.
Neither method is wrong. They simply produce different pastries.
Flavor variations for a classic glazed donut
Once you have mastered the basic glaze, you can make subtle changes without losing the classic character.
A vanilla bean glaze adds tiny flecks and a deeper vanilla aroma.
A maple glaze works beautifully in cooler months and pairs naturally with coffee.
A lemon glaze brings brightness and can make the donut taste less heavy.
A cinnamon glaze gives you a warmer, bakery-style flavor.
For chocolate lovers, replace part of the powdered sugar mixture with cocoa powder and add enough milk to reach the right consistency.
You can also add toppings immediately after glazing:
- Toasted chopped pecans
- Walnuts
- Coconut
- Sprinkles
- Cinnamon
- Finely grated chocolate
- A small pinch of flaky salt
The key is to keep the topping proportional. If you pile on too many extras, you lose the simple appeal of a classic glazed donut.
For a weekend breakfast, I would choose vanilla or maple. For a party, chocolate or sprinkle toppings make the donuts more playful.
How to store and serve homemade glazed donuts
Freshness is everything with homemade donuts.
They are at their best on the day you make them. Sally’s recipe describes the homemade glazed donuts as a weekend project and notes that the glaze sets after dipping, while King Arthur recommends keeping cooled donuts well wrapped at room temperature for a couple of days for its cake-doughnut recipe.
Store them in an airtight container at room temperature if you plan to eat them soon. Keep them away from direct sunlight and heat.
Do not automatically refrigerate them. Cold temperatures can make the texture firmer and less pleasant.
For longer storage, freezing is a better option. King Arthur recommends freezing cooled cake doughnuts for longer storage.
If you are serving them for breakfast, make them as close to serving time as practical. A warm donut with freshly set glaze is difficult to beat.
For a brunch table, arrange them on a simple platter with coffee, fresh berries, and perhaps scrambled eggs or fruit on the side. The donut remains the star without making the whole meal feel overwhelmingly sweet.
Expert tips for bakery-style results

The biggest improvement you can make is to use a thermometer. Measure the frying oil instead of guessing.
Next, weigh your flour if you have a kitchen scale. Volume measurements can vary depending on how tightly flour gets packed into a measuring cup.
Keep your dough soft. A slightly sticky dough is much easier to work with after the first rise than an overly dry dough.
Give the dough enough time. Yeast cannot be rushed simply because you are hungry.
Use a neutral oil and keep the frying temperature steady. King Arthur recommends gradual heat adjustments because frying fat can retain heat and respond slowly to changes.
For the glaze, add liquid slowly. You want a coating that flows from the spoon in a smooth ribbon but still clings to the donut.
And finally, fry a test donut before cooking the entire batch. Cut it open after it cools briefly. If the center is doughy, adjust your frying time or temperature before continuing.
That one test can save an entire batch.
Final thoughts on old fashioned glazed donut
A great old fashioned glazed donut does not need a complicated topping or a long ingredient list. What matters is the dough, the rise, the frying temperature, and the glaze. When those four pieces work together, the result is soft, airy, golden, and sweet without becoming overwhelming.
If you are making these for the first time, give yourself enough time. Homemade yeast-raised donuts are not a five-minute breakfast, but the waiting is part of what makes them rewarding. Established recipes commonly take a couple of hours because much of the time goes toward rising rather than active cooking.
Start with the classic version before experimenting. Once you know how the dough should feel and how a properly fried donut should look, you can confidently play with maple, lemon, chocolate, cinnamon, nuts, or other flavors.
Most importantly, do not judge your first batch too harshly. Donut making has a learning curve. Your kitchen temperature, flour, yeast, oil, and equipment all behave a little differently.
Make a small test donut, pay attention to the results, and adjust. Before long, you will know exactly when the dough is ready, how hot the oil should be, and how thick your glaze needs to be.
That is when homemade donuts stop feeling like a difficult weekend project and start feeling like something you can make whenever the craving hits.
FAQs
1. Is an old fashioned glazed donut a cake donut or a yeast donut?
The term can describe different styles. Traditionally, an old-fashioned donut often refers to a cake-style donut with a textured, cracked surface. However, some recipes and bakeries use “old fashioned” more loosely for a classic homemade glazed donut. If you want a light and airy interior, choose a yeast-raised recipe; if you prefer a denser, tender crumb, choose a cake-donut recipe. King Arthur’s recipes clearly distinguish traditional cake donuts from yeast-raised donuts.
2. Why are my homemade glazed donuts not fluffy?
The most common causes are inactive yeast, too much flour, insufficient rising time, or rough handling after the dough has risen. Give the dough enough time to increase in size and keep it soft rather than adding excessive flour.
3. What temperature should I fry glazed donuts at?
The exact temperature depends on the recipe, but yeast-raised recipes commonly use oil in the mid- to high-300°F range. Sally’s recipe uses 375°F, while King Arthur’s old-fashioned cake-doughnut recipe recommends 365–375°F. Use a thermometer and follow the temperature specified for your particular dough.
4. Why does my donut glaze disappear? ,
The glaze may be too thin, or the donuts may be too hot when dipped. Add powdered sugar to thicken a runny glaze and allow excessively hot donuts to cool slightly before glazing. A simple powdered-sugar, milk, and vanilla glaze should form a visible coating when the consistency is right.
5. Can I bake an old fashioned glazed donut instead of frying it?
Yes, but the texture will change. Baked donuts generally have a different crust and flavor from fried donuts. King Arthur notes that baked cake donuts are a newer alternative to traditional deep-fried versions, while its yeast-raised recipe also explains that baking produces a less crisp result.
6. How long do homemade glazed donuts stay fresh?
They taste best on the day they are made. Properly wrapped donuts can remain at room temperature for a short period, while freezing is a better option for longer storage. King Arthur recommends well-wrapped room-temperature storage for a couple of days for its cake donuts and freezing for longer storage.
7. What is the secret to making bakery-style glazed donuts at home?
Focus on the fundamentals: use fresh yeast, keep the dough soft, allow both rises to finish properly, maintain steady oil temperature, and make a glaze that is thick enough to coat the surface. A thermometer and a test donut are two simple tools that can dramatically improve consistency.