
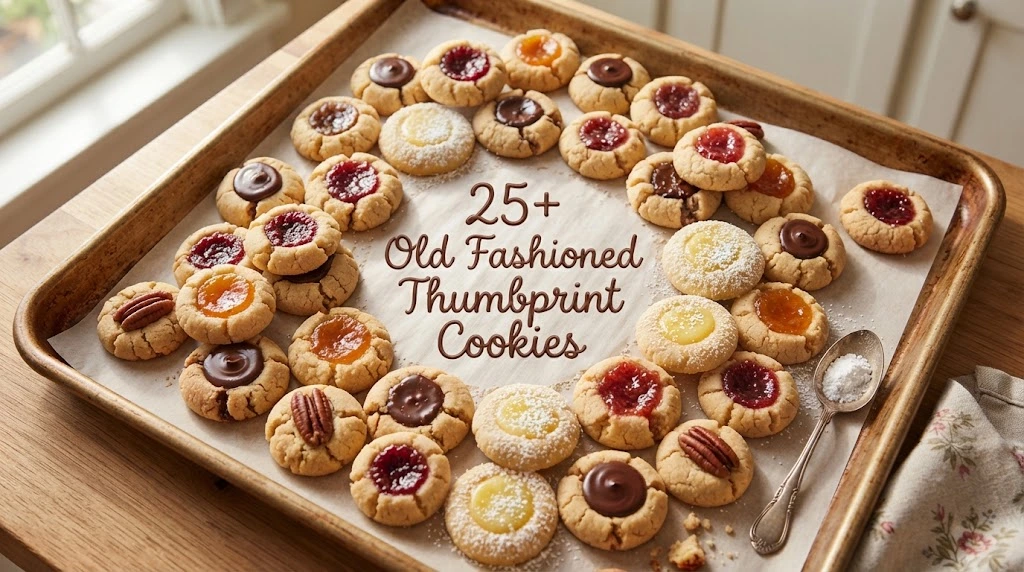
There is a certain kind of cookie that makes a kitchen feel warm before you even take the first bite. You smell butter and vanilla in the oven, see little jewel-like pools of jam glowing in the centers, and suddenly the whole batch feels like something that belongs in an old family recipe box.
Old fashioned thumbprint cookies are exactly that kind of treat. They are simple, buttery cookies with a soft center, lightly crisp edges, and a spoonful of jam tucked into a small indentation. The recipe does not need fancy equipment, unusual ingredients, or complicated decorating skills. In fact, part of the appeal is how wonderfully uncomplicated it is.
The traditional idea is remarkably flexible, too. Raspberry jam is the familiar favorite, but strawberry, apricot, blackberry, cherry, lemon curd, chocolate, and even sweetened nut butter can work beautifully. King Arthur Baking, for example, recommends jam, ganache, sweetened nut butter, or icing as possible fillings for its classic thumbprints.
The real trick is getting the cookie dough texture right. If the dough is too soft, the cookies spread and lose their shape. If it is too dry, they crack when you make the thumbprint. Once you understand that balance, these old-fashioned jam cookies become one of the easiest and most dependable treats to keep in your baking rotation.
What makes old fashioned thumbprint cookies special
Thumbprint cookies are usually made from a rich, buttery dough that resembles shortbread. You roll the dough into small balls, press an indentation into the center, add jam, and bake until the edges are lightly golden.
The name comes from the simple shaping method. Traditionally, the indentation is made with your thumb, although a small measuring spoon or the rounded end of a wooden spoon works just as well.
The finished cookie should have several textures at once. The outside should feel tender rather than hard, the edges should have a little bite, and the center should remain pleasantly soft from the fruit filling.
That contrast is what keeps them interesting.
A good thumbprint should not taste like a plain sugar cookie with jam dumped on top. The butter, vanilla, salt, and fruit should all have a clear role.
Classic versions often use raspberry jam because its tartness cuts through the richness of the butter. Strawberry jam gives a sweeter, softer result, while apricot creates a more delicate flavor.
There is also a practical reason these cookies have remained popular: they are naturally pretty. A tray of golden cookies with red, purple, or orange centers looks festive without icing bags, elaborate decorations, or professional pastry skills.
The best classic thumbprint cookie ingredients
For a traditional batch of about 30 to 36 cookies, gather:
- 1 cup unsalted butter, softened
- ⅔ cup granulated sugar
- 1 large egg yolk
- 2 teaspoons vanilla extract
- 2½ cups all-purpose flour
- ¼ teaspoon salt
- ½ cup raspberry, strawberry, or apricot jam
This style of recipe follows the classic buttery jam-filled approach used in traditional thumbprint cookies. Modern recipes vary in their exact ratios, but the basic formula remains remarkably consistent: butter, sugar, flour, egg or egg yolk, flavoring, and fruit filling. Epicurious describes the classic style as a buttery, shortbread-like cookie that can be paired with raspberry, apricot, or strawberry jam.
The egg yolk contributes richness without adding as much water as a whole egg. That helps produce a tender cookie that still holds its shape.
Use real butter rather than margarine if you want the classic flavor. Unsalted butter gives you more control over the salt level, especially because different brands of salted butter contain different amounts of salt.
All-purpose flour is ideal for this recipe. Measure it carefully because too much flour can make the dough stiff and crumbly.
For the jam, choose one that has a thick, spoonable texture. Very runny jam can spread across the cookie during baking.
How to make the old-fashioned thumbprint cookie dough
Begin by letting the butter soften at room temperature.
You want it soft enough that a finger can make a slight indentation, but it should not look melted or greasy. If the butter becomes too warm, the finished dough may spread excessively in the oven.
Beat the softened butter and sugar together until smooth and creamy. You do not need to whip the mixture for a long time. The goal is an even mixture rather than a huge amount of air.
Add the egg yolk and vanilla. Mix until they disappear into the butter mixture.
In a separate bowl, stir together the flour and salt.
Gradually add the dry ingredients to the butter mixture. Mix only until the flour is incorporated.
This is one place where restraint helps. Once the flour has disappeared, stop mixing. Overworking the dough can make the cookies less tender.
The finished dough should feel soft but workable. It should hold together easily when pressed between your fingers.
If the dough seems extremely sticky, refrigerate it for a short time before shaping. If it feels unusually dry and refuses to hold together, check whether you accidentally added too much flour.
A kitchen scale gives the most consistent results, but careful measuring also works well.
King Arthur Baking’s classic thumbprint method chills the dough for about an hour before shaping, which is a useful technique when you want cookies that hold their shape particularly well.
How to shape thumbprint cookies without cracking them
Once the dough is ready, divide it into small, even portions.
A tablespoon-sized scoop makes this much easier. Roll each portion between your palms until it becomes a smooth ball.
Place the balls on a parchment-lined baking sheet, leaving enough room between them for slight spreading.
Now make the signature indentation.
You can use your thumb, but there is a small technique that makes a big difference: press straight down rather than squeezing the dough from the sides.
If the dough cracks badly around the edges, the dough may be too cold or slightly too dry. Letting it sit for a few minutes at room temperature can make it easier to shape.
If you prefer a perfectly uniform batch, use the back of a small rounded measuring spoon. This produces nearly identical centers, which is especially helpful when you are making cookies for a holiday tray.
The indentation should be deep enough to hold the jam but not so deep that you nearly break through the bottom.
A good target is roughly the depth of a small teaspoon bowl.
After shaping, inspect each cookie. If you see a large crack, gently smooth it with your fingertip before adding the filling.
That tiny bit of attention prevents cracks from becoming much larger during baking.
How to choose the right jam for thumbprint cookies
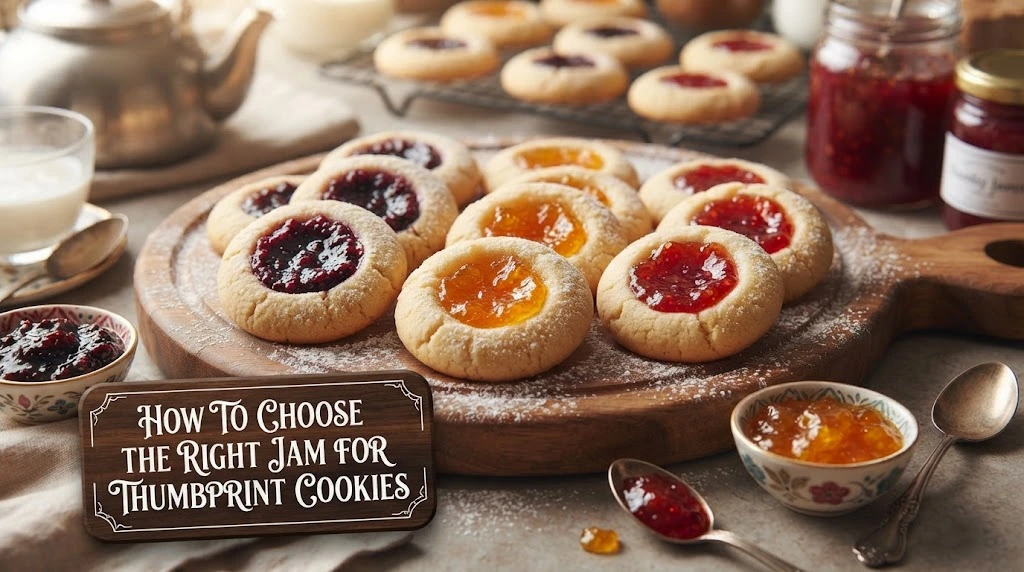
Raspberry is the classic choice for good reason.
Its bright tartness balances the rich butter cookie beautifully. Seedless raspberry preserves give you an especially smooth, jewel-like center.
But you are certainly not limited to raspberry.
Strawberry jam
Strawberry creates a sweeter, familiar flavor and works wonderfully for children or anyone who prefers a milder fruit filling.
Apricot preserves
Apricot is less intense and slightly floral. It is an excellent choice when you want the cookie itself to remain the star.
Blackberry jam
Blackberry gives the cookies a deeper berry flavor and a beautiful dark purple center.
Cherry preserves
Cherry adds a slightly richer fruit flavor and pairs especially well with almond extract.
Lemon curd
Lemon curd turns the cookies into something brighter and more delicate. Its acidity cuts through the butter beautifully.
Orange marmalade
Marmalade adds citrus bitterness along with sweetness. Choose a finely cut variety if you want a smooth center.
Apple butter
Apple butter gives a cozy autumn flavor, although its texture may behave differently from standard jam.
The important thing is to use a thick filling. If your jam is unusually stiff, stir it thoroughly before using it. If necessary, warm it very gently just until it becomes spoonable, then let it cool enough to handle.
King Arthur Baking specifically notes that thumbprints can be filled with jam, ganache, sweetened nut butter, or icing, showing just how adaptable the basic cookie is.
Should you fill thumbprint cookies before or after baking?
This is one of the most debated parts of thumbprint baking.
There is no single universal method because different doughs and fillings behave differently.
For a traditional jam-filled cookie, baking with the jam already in the indentation is a classic approach. The jam warms in the oven and settles into the center.
Other recipes bake the cookies first and add the filling afterward. King Arthur Baking’s classic thumbprint recipe, for example, partially bakes the cookies, creates the indentation, finishes baking, and then fills the cooled cookies.
Both methods can work.
If you want a glossy jam center that becomes part of the cookie as it bakes, fill before baking.
If you want the jam to look especially bright and fresh, adding it after baking can give you more control.
There is also a useful middle ground: some bakers bake the cookies until nearly done, refresh the indentation if needed, and then add a small amount of jam before returning them briefly to the oven.
For a true old-fashioned feel, I prefer baking the jam into the center. It gives the cookies a homemade appearance and lets the fruit flavor mingle with the buttery dough.
Whichever method you choose, avoid filling the indentation too generously. Jam expands and bubbles as it heats.
A little goes a surprisingly long way.
The best oven temperature and baking time
A dependable starting point is 350°F (175°C).
Bake the cookies until the edges are lightly golden and the centers look set.
Depending on the size of your cookies and the recipe variation, this can take roughly 10 to 18 minutes.
King Arthur’s nut-coated thumbprint cookies bake in stages at 350°F, while its chocolate-raspberry thumbprints bake for 16 to 18 minutes. Other traditional jam-drop styles bake for around 14 minutes.
That range is important because cookie size has a major effect on baking time.
A small one-inch cookie may finish quickly. A larger bakery-style thumbprint can need several additional minutes.
Do not rely only on the clock.
Look for visual clues:
- Edges should be lightly golden.
- The surface should look set.
- The cookie should no longer look wet or raw.
- The jam should be warm and glossy.
- The bottoms should not be dark brown.
Remember that cookies continue to firm as they cool.
If you wait for the entire cookie to become hard in the oven, you will probably end up with a dry cookie once it reaches room temperature.
That is why slightly underbaked is often better than overbaked for a tender thumbprint.
How to keep thumbprint cookies soft and buttery
The texture of these cookies depends heavily on the butter-to-flour balance.
Too much flour creates a dry, crumbly cookie. Too little flour can leave you with cookies that spread into flat discs.
Start by measuring the flour accurately.
If you use measuring cups, spoon flour lightly into the cup and level it with a straight edge instead of scooping directly from the flour container. A scale is even better.
Butter temperature matters, too.
Soft butter blends easily with sugar. Melted butter behaves very differently and can make the dough too loose.
Another useful trick is not to overbake.
The cookies should be firm enough to hold their shape, but they do not need to become deeply brown.
Vanilla also deserves attention. A good vanilla extract gives the cookie a warm background flavor that supports the fruit without competing with it.
Finally, let the cookies cool properly.
Leave them on the baking sheet for several minutes after removing them from the oven. They are delicate while hot and can break if you move them too quickly.
King Arthur Baking similarly recommends allowing baked thumbprints to cool before transferring them to a rack.
Why thumbprint cookies spread, crack, or lose their shape
If your cookies spread into flat puddles, the most likely culprit is warm dough.
Butter softens dramatically as it heats. If the dough sits in a warm kitchen for too long, the cookies can spread before their structure sets in the oven.
Chill the shaped dough for 20 to 30 minutes if necessary.
Another cause is too little flour. Even a small measuring error can matter in a simple cookie recipe.
If your cookies crack when you make the indentation, the dough may be too cold or too dry.
Let very cold dough warm slightly before shaping.
If the edges split just a little, that is not necessarily a problem. Old-fashioned thumbprint cookies often have a handmade look.
If the cookies crack dramatically during baking, check your flour measurement and avoid packing excessive flour into your measuring cup.
Problem: The jam runs over the sides
You probably used too much.
Fill the center only until the indentation looks comfortably full. The jam will spread as it heats.
Problem: The center disappears
The indentation may have been too shallow.
Press slightly deeper, but do not push all the way through the dough.
Problem: The bottoms burn
Your baking sheet may be dark, your oven may run hot, or the cookies may be too close to the bottom heating element.
A light-colored baking sheet lined with parchment can make the baking process more forgiving.
Problem: The cookies are hard
They likely baked too long or contained too much flour.
Next time, remove them as soon as the edges are lightly golden and the centers look set.
A simple nut-coated version of traditional thumbprints
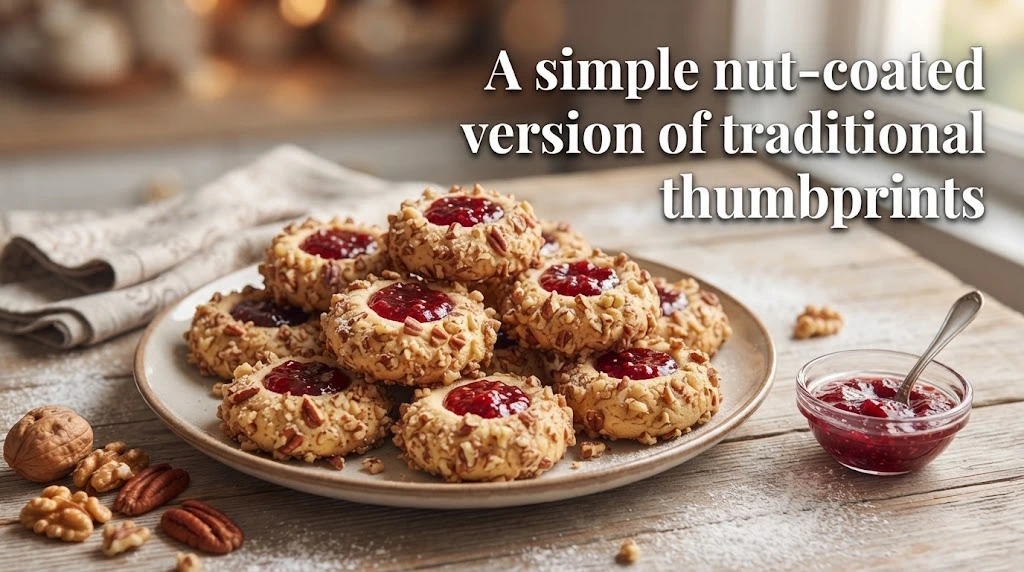
If you want a more old-fashioned bakery-style cookie, add chopped nuts around the outside.
A traditional method coats the dough balls in beaten egg white and chopped nuts before baking. King Arthur Baking uses this technique in its classic thumbprint recipe and then adds the filling after the cookies bake.
Finely chopped pecans are particularly good.
Walnuts work too, although their flavor is slightly more bitter.
Almonds give the cookies a delicate crunch and pair naturally with apricot or cherry filling.
For this style, chop the nuts finely enough that they stick to the dough rather than falling away.
Roll each dough ball in beaten egg white, then gently press it into the chopped nuts.
Place the coated balls on the baking sheet and make the center indentation after coating.
The result is more textured than the plain version. The nuts add crunch around the outside while the jam keeps the middle soft.
If you are serving these at Christmas, a light dusting of powdered sugar after cooling makes the nut-coated version look particularly festive.
How to make raspberry thumbprint cookies the traditional way
Raspberry thumbprints are probably the version most people picture when they hear the name.
Use a good-quality raspberry jam or seedless raspberry preserves.
The dough should be buttery and lightly sweet rather than overly sugary. That allows the raspberry filling to remain noticeable.
For approximately 30 cookies, prepare the dough using:
- 1 cup softened unsalted butter
- ⅔ cup granulated sugar
- 1 egg yolk
- 2 teaspoons vanilla
- 2½ cups all-purpose flour
- ¼ teaspoon salt
- About ½ cup raspberry jam
Chill the dough if it feels soft.
Roll it into small balls and arrange them on parchment.
Make a neat indentation in each center.
Add roughly ½ teaspoon of raspberry jam to each cookie, adjusting according to the size of the indentation.
Bake at 350°F until the edges are lightly golden and the centers are set.
Let them cool before moving them to a wire rack.
If you want an especially polished finish, add a thin vanilla glaze after the cookies cool. King Arthur Baking uses a simple confectioners’ sugar glaze as an optional decorative finish on its lemon thumbprints.
The glaze is optional, though. A traditional raspberry thumbprint is beautiful without it.
Easy variations for holidays and special occasions
Thumbprint cookies are wonderfully easy to adapt because the base dough acts like a blank canvas.
For Christmas, use raspberry, cherry, and apricot fillings on the same tray. The different colors make the assortment look much more elaborate than it really is.
For Valentine’s Day, use strawberry and raspberry jam. A small drizzle of white chocolate can add a pretty finish.
For Easter, lemon curd and apricot preserves create a softer spring-like flavor.
For Thanksgiving, try apple butter, cranberry preserves, or spiced plum jam.
For a winter cookie exchange, use chocolate ganache in some cookies and raspberry jam in others.
You can also change the dough slightly.
Almond thumbprints
Add a little almond extract and use apricot or raspberry filling. Almond flour can also make the cookies richer and more tender. King Arthur Baking currently offers an almond thumbprint variation using almond flour and almond extract.
Lemon thumbprints
Add finely grated lemon zest to the dough and fill the centers with lemon curd or raspberry jam. Lemon thumbprints make a particularly refreshing addition to a holiday cookie tray.
Chocolate thumbprints
Add cocoa powder to the dough and fill the centers with raspberry jam. The combination of dark chocolate and tart raspberry is especially good.
King Arthur Baking’s chocolate-raspberry version combines cocoa with raspberry jam and offers an optional chocolate drizzle.
Nutella-style centers
Use a chocolate-hazelnut spread after baking for a soft, rich center.
Peanut butter centers
A small amount of sweetened peanut butter can replace the fruit filling, creating a completely different cookie while keeping the thumbprint shape.
How to store homemade thumbprint cookies
Once the cookies have cooled completely, place them in an airtight container.
Keep layers separated with parchment paper if the jam remains sticky.
At room temperature, most traditional thumbprint cookies are best enjoyed within several days. King Arthur Baking recommends storing its thumbprints well wrapped at room temperature for several days and freezing them for longer storage.
Avoid sealing cookies while they are still warm.
Warm cookies release moisture, and trapped moisture can soften the exterior and make the cookies lose their pleasant texture.
If you are preparing them for a holiday gathering, baking them a day or two ahead is perfectly practical.
For longer storage, freeze the fully cooled cookies in an airtight freezer-safe container.
Place parchment between layers so the jam does not cause them to stick together.
You can also freeze portions of unbaked dough. Wrap it tightly, label it with the date, and thaw it in the refrigerator before shaping.
For the freshest-looking cookies, however, I prefer freezing the dough rather than fully assembled cookies when I know I will have time to bake later.
That way, the jam centers look freshly baked when you serve them.
How to make thumbprint cookies look bakery-worthy
The charm of these cookies is their homemade appearance, but a few styling tricks can make them look polished enough for a gift box.
Start with uniform sizing.
Use a cookie scoop rather than guessing each portion by eye. Even cookies bake more evenly and look much better arranged together.
Next, keep the indentations similar in size.
A small measuring spoon gives you consistent centers.
Choose fillings with strong color contrast. Raspberry jam against a pale golden cookie is hard to beat.
For a holiday platter, arrange different flavors in a repeating pattern rather than mixing them randomly.
For example:
- Raspberry
- Apricot
- Chocolate
- Raspberry
- Apricot
- Chocolate
The repeated colors make the tray look intentional.
A light dusting of confectioners’ sugar can also make the cookies look finished without covering the jam.
If you add glaze, keep it thin.
Too much icing hides the attractive center that gives a thumbprint cookie its character.
For gifts, place cookies in small paper liners inside a shallow tin. This prevents them from rubbing against each other and keeps the jam centers looking neat.
There is no need to make them overly perfect. A slight variation in shape is part of what makes an old-fashioned cookie feel homemade rather than factory-made.
Common mistakes to avoid when baking thumbprint cookies
Even a simple cookie can go wrong when a few small details are overlooked.
Using melted butter: This can make the dough too soft and encourage spreading.
Adding too much flour: This creates a dry dough that cracks easily.
Overmixing: Once the flour disappears, stop mixing.
Skipping chilling when the dough is soft: Chilling gives the butter time to firm up and helps the cookies hold their shape.
Making the indentation too deep: You risk breaking through the bottom.
Making it too shallow: There will not be enough room for the jam.
Overfilling with jam: The filling can bubble over the cookie.
Baking until dark brown: Thumbprints are usually best when the edges are lightly golden rather than deeply browned.
Moving them while hot: Fresh cookies are fragile and can break.
Storing them while warm: Trapped steam can soften the cookies.
There is another mistake that experienced bakers sometimes make: changing several ingredients at once.
If you want to make a recipe your own, change one thing first. Try raspberry instead of strawberry jam. Then try almond extract in the next batch. This makes it much easier to understand which change actually improved the cookie.
The simplest recipes are often the easiest to learn from because every ingredient has a noticeable effect.
How to make old fashioned thumbprint cookies ahead of time
These cookies are excellent for advance baking.
If you have a busy holiday schedule, prepare the dough several days before you plan to bake. Wrap it tightly and refrigerate it.
King Arthur Baking notes that some thumbprint doughs can be chilled for extended periods, and its Fiori thumbprint dough can be made up to three days ahead.
For longer storage, freeze the dough.
When you are ready to bake, thaw it in the refrigerator until workable. Let it soften slightly at room temperature if necessary, then scoop, roll, indent, and fill.
You can also bake the cookies ahead and freeze them.
That is particularly useful for Christmas cookie exchanges because thumbprints hold up well when properly wrapped.
If you are making several varieties, bake the plainest flavors first and stronger flavors later. This reduces the chance of your delicate vanilla cookies picking up the aroma of peppermint, spices, or strongly flavored fillings.
For a large cookie platter, make the cookies in different sizes only if you plan to serve them separately. Uniform cookies are easier to arrange and look more professional.
A simple production plan works well:
- Day 1: Make and chill the dough.
- Day 2: Shape and bake the cookies.
- Day 3: Arrange and serve.
That schedule takes much of the pressure out of holiday baking.
The easiest complete old-fashioned thumbprint cookie recipe
If you simply want the recipe without sorting through variations, this is the version I would start with.
Ingredients
- 1 cup unsalted butter, softened
- ⅔ cup granulated sugar
- 1 large egg yolk
- 2 teaspoons vanilla extract
- 2½ cups all-purpose flour
- ¼ teaspoon salt
- ½ cup thick raspberry or strawberry jam
Instructions
- Heat the oven to 350°F (175°C) and line baking sheets with parchment paper.
- Beat the softened butter and sugar together until smooth and creamy.
- Add the egg yolk and vanilla. Mix until well combined.
- Whisk the flour and salt together in another bowl.
- Gradually add the dry ingredients to the butter mixture. Mix only until a soft dough forms.
- Cover the dough and refrigerate it for about 30 to 60 minutes, especially if it feels soft.
- Scoop small portions of dough and roll them into smooth balls.
- Arrange them on the prepared baking sheets with space between each cookie.
- Press a thumb or small rounded spoon into the center of each ball to make a deep but not-too-deep indentation.
- Fill each center with about ½ teaspoon of jam.
- Bake for approximately 10 to 15 minutes, depending on cookie size, until the edges are lightly golden.
- Let the cookies cool on the baking sheet for several minutes.
- Transfer them to a wire rack and cool completely.
- Dust lightly with confectioners’ sugar if desired.
This method produces a tender, buttery cookie with a soft fruit center and enough structure to handle a cookie tin or dessert platter.
For a different traditional technique, you can bake the shaped cookies before adding the jam, as in King Arthur Baking’s classic version.
The important thing is not to become overly attached to one exact technique. Thumbprint cookies have been made in many forms for generations. What matters most is achieving a tender dough, a controlled indentation, and a filling that complements rather than overwhelms the cookie.
Conclusion
Old-fashioned thumbprint cookies are proof that a memorable dessert does not need a long ingredient list.
Butter, sugar, flour, vanilla, and a little fruit jam can create something that looks beautiful and tastes genuinely homemade. The recipe is easy enough for a beginner but still offers plenty of room for an experienced baker to experiment with different fillings, nuts, citrus, chocolate, and spices.
The biggest lessons are simple: use properly softened butter, measure the flour carefully, chill soft dough, make a controlled indentation, avoid overfilling the center, and take the cookies out when the edges are lightly golden.
Then let them cool.
That final bit of patience matters. The cookies become firmer and easier to handle as they cool, while the jam settles into its glossy center.
Whether you make raspberry thumbprints for Christmas, apricot cookies for afternoon tea, or chocolate-raspberry versions for a special occasion, the basic idea remains wonderfully old-fashioned.
And perhaps that is exactly why they are still so appealing. They look like the sort of cookies someone might have carried to a neighbor in a small tin decades ago—and they taste just as welcome today.
Frequently asked questions about old fashioned thumbprint cookies
1. Why are my thumbprint cookies spreading in the oven?
The dough may be too warm, the butter may have been too soft, or the flour may have been under-measured. Chilling the dough before baking usually helps the cookies hold their shape. King Arthur Baking also uses a chilled dough in its classic thumbprint method.
2. Should thumbprint cookies be filled before or after baking?
Either method can work. Some traditional recipes bake the jam directly in the indentation, while others bake the cookie first and add the filling afterward. Baking the jam gives a more integrated, rustic result; filling afterward gives a brighter, fresher-looking center.
3. What is the best jam for thumbprint cookies?
Raspberry is the classic choice because its tart flavor balances the buttery dough. Strawberry, apricot, blackberry, cherry, lemon curd, and other thick fruit fillings are also excellent.
4. Why do my thumbprint cookies crack?
A little cracking is normal and can add to their homemade appearance. Large cracks usually mean the dough is too dry or too cold. Check your flour measurement and let very cold dough soften slightly before making the indentations.
5. Can I make thumbprint cookie dough ahead of time?
Yes. You can refrigerate the dough for later baking, and many thumbprint recipes also freeze well. Some recipes can be prepared several days ahead, making them particularly convenient for holiday baking.
6. Can I freeze baked thumbprint cookies?
Yes. Cool them completely, then pack them in an airtight freezer-safe container with parchment between layers. Allow them to thaw while still covered to reduce condensation on the cookies.
7. How do I keep the jam from overflowing?
Use a modest amount of thick jam and leave a little room below the top of the indentation. Jam expands and bubbles as it heats, so filling the cookie to the brim before baking usually creates unnecessary mess.